New Provide - No Line Plant Available
Having completed the address matching and chosen a "Gold" address then the Portal queries Openreach's network availability. If there are no spare pairs or stopped lines at the premises then the line installation must proceed without line plant. If having completed address matching a non "Gold" address is being used (i.e. a "Silver" address or an address entered by the user) then the same process is followed, except a line number cannot be reserved for a line installation in a non "Gold" address.
If using a "Gold" address and there is no line plant then the next screen displayed is the number selection screen. If using a non "Gold" address then this stage is skipped. The options available for number selection are to have an automatically allocated number or pick from a list of available numbers (which take a few seconds to be displayed), see below:
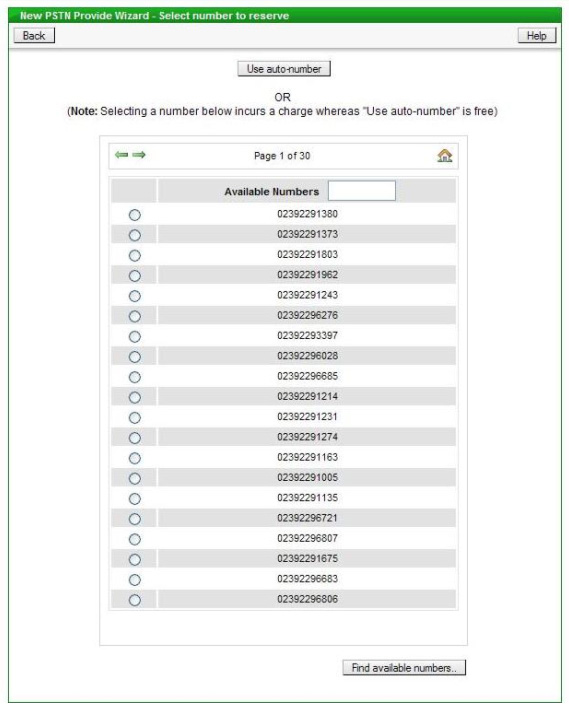
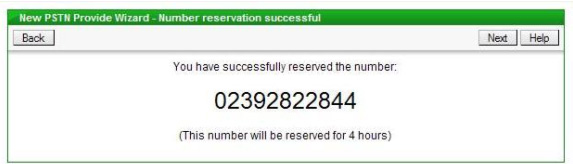
The list of available numbers can be narrowed down, if required, by entering a string of digits in the box provided - only numbers containing that digit string will then be shown in the list. If a number from the list is chosen, as opposed to using "auto-number", then a charge is a levied by Openreach. If "auto-number" is used then the number allocated will be displayed on screen for reference, for example:
The next step is to enter a Simultaneous Broadband Reference if required if the new provide is of a Single Line. There are two options for Simultaneous Broadband - submit the line order before the broadband order or vice versa. If you have submitted the broadband order first or have a specific requirement to use your own reference then tick the "Simultaneous Broadband Required?" box and then enter your reference in the box provided and click the "Submit supplied Ref" button. If you are submitting the line order first and are happy to use the Portal generated reference, then tick the "Simultaneous Broadband Required?" box and then click the "Submit generated Ref" button. An example of the screen is below:

If Simultaneous Broadband is not required then just click the "Not Required" button.
The next screen allows Extensions to be requested as part of the installation (Single Lines only), the termination type to be selected (for Premium Single Lines and Multilines) and the Signal Type for the line, see below:
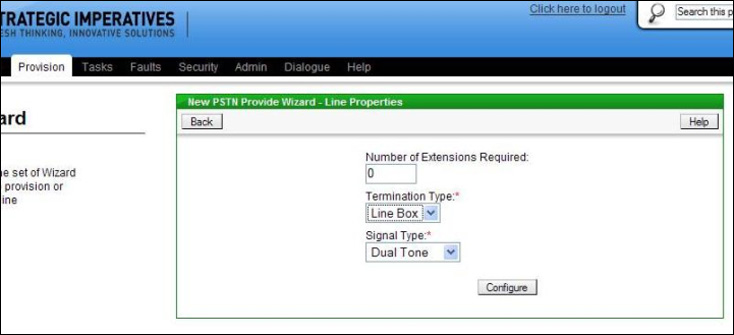
If no changes are required to the default settings then click the "Configure" button, otherwise make the required changes first. If the number of extensions required is greater than zero then authorisation will also have to be provided for Time Related Charges, this is done by selecting a value other than "No Authority" on the Charge Bands screen, see below:
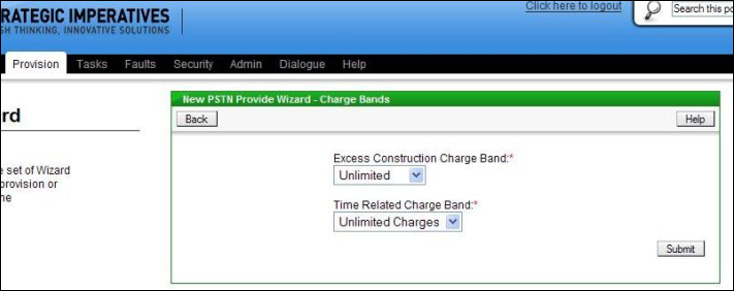
The default setting is "Unlimited" which would allow any work to be completed, this can be reduced to another option, however it is important not to set the authorisation too low (depending on how many extensions are requested) because the engineer will not install the extension wiring if he or she estimates that it will take longer than the maximum time authorised (the new install would still go ahead without the extension wiring).
Where requesting a new provide with no line plant available there is a small chance that Excess Construction Charges will apply to the installation, these are additional charges over and above the standard new provide charge, which Openreach levy in certain circumstances. Whether Excess Construction Charges will apply and if so, the amount, is not known at order placement, however the user can authorise up to a certain amount in advance to ensure the installation gets done as quick as possible - this is done on the same screen as the Time Related Charge authorisation - just choose the level of authorisation from the drop down box. If, at a later date, this authorisation proves insufficient Openreach will advise of the estimated level of Excess Construction Charges and there will be an opportunity to revise the banding.
The Calling and Network Features and Care Level screen is displayed next - this is common to all provisioning scenarios and is explained in more detail in a later section.
Once the Features have been chosen the next screen is for capturing the on site contact name, which Openreach require, and any engineer related notes, see below:
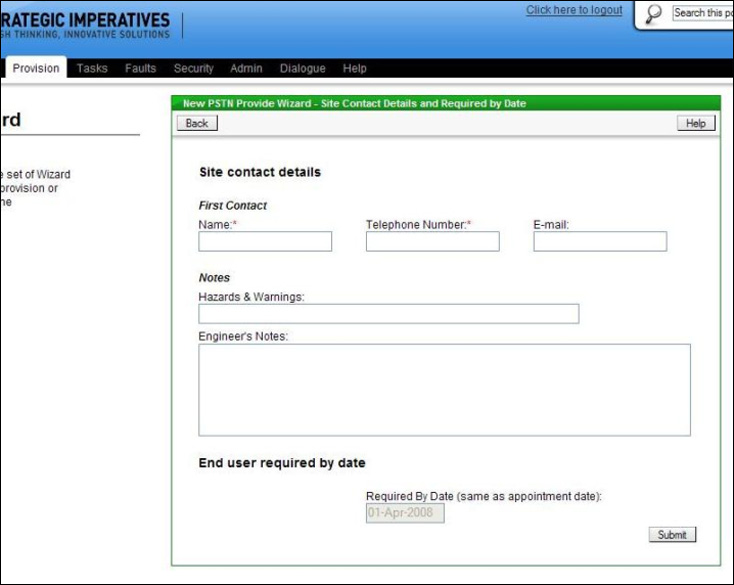
The Hazard and Warnings field on this screen is for the entry of any notes which the engineer would need to know from a safety perspective. The larger engineer's notes field is for any other specific instructions or useful information for the engineer - for instance where to install the extensions if extensions have been requested.
The "Required by Date" must also be selected on this screen. This must be a minimum of 3 working days in advance, or 7 working days in advance if Simultaneous Broadband is requested - this the date the customer would like their line by. In many cases Openreach will not be able to install the line on the "Required by Date" unless it is sometime in advance - this is due to the extra work required where no line plant exists.
The "Required by Date" box is pre-filled with the minimum lead time; if required the user can change the date to a future date (as long as it's a working day), there is a "calendar" button to allow this to be done easily using a pop-up calendar.

The Directory Entry screen is displayed next - this is common to all provisioning scenarios and is explained in more detail in a later section. When the directory entry has been chosen and the "Add" button clicked, then the order is submitted to Openreach, this is confirmed on screen with the Openreach order reference, for example:
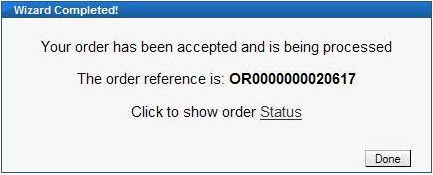
Clicking on the "Order Status" link will display the details of the order and allow its current status to be tracked through to completion.
| Previous subject | Main Navigation | Next subject |