New Provide - Restarting a Stopped Line
Having completed the address matching and chosen a "Gold" address and also chosen a Basic or Premium Single Line then the Portal queries Openreach's network availability. If one or more Stopped Lines is available at the premises then the option is available to restart one of these. The Stopped Lines will be listed on screen:
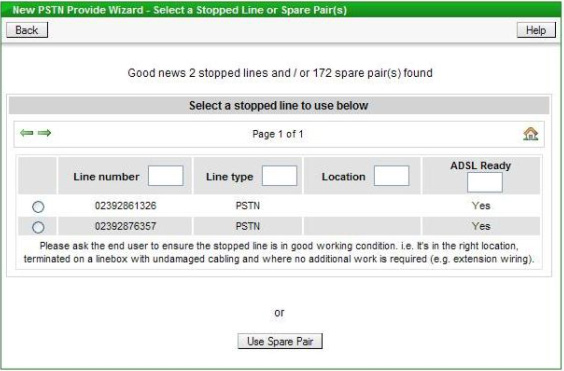
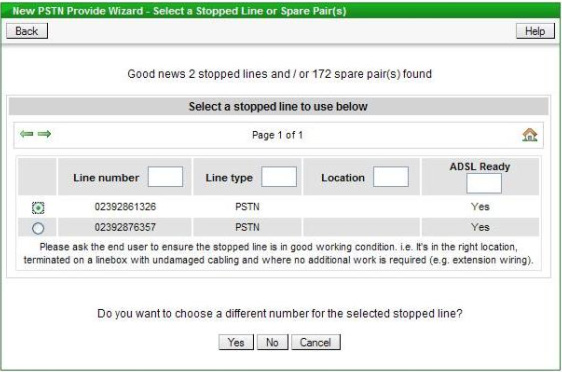
The number for each Stopped Line is listed so a specific line can be selected for restarting - there is a radio button to the left of the line number which can be clicked to select that number. The column on the right indicates whether the line is "ADSL Ready" or not; if the line is served via a DACS device or via TPON (optical network infrastructure) then "No" appears in this column next to the line to indicate that any subsequent ADSL order would be delayed or rejected. When a Stopped Line has been selected there is the option to keep the existing number or choose a new one, see below:
To change the number click the "Yes" button; the next screen displayed offers the choice of being automatically allocated another number or picking from a list of available numbers (which take a few seconds to be displayed), see below:
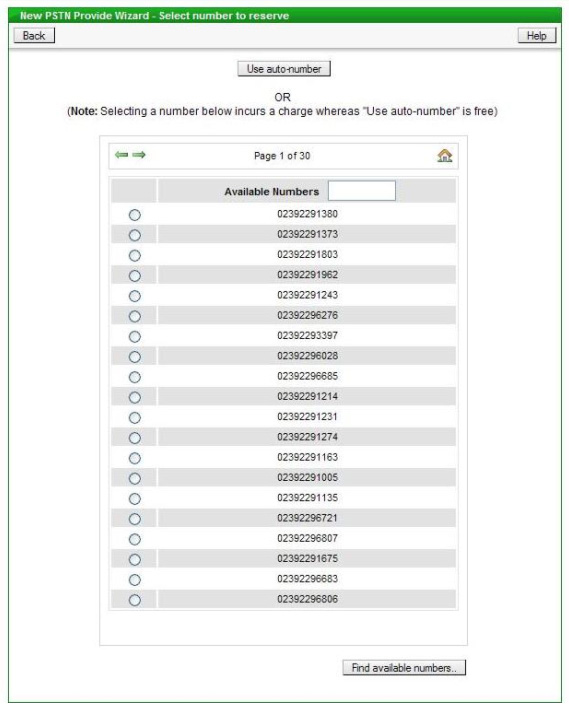
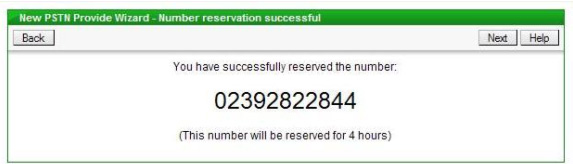
The list of available numbers can be narrowed down, if required, by entering a string of digits in the box provided - only numbers containing that digit string will then be shown in the list. If a number from the list is chosen, as opposed to using "auto-number", then a charge is a levied by Openreach. All numbers listed are from the same cluster at the exchange as the current number of the Stopped Line - this ensures that the restart can be done on the same day. If "auto-number" is used then the number allocated will be displayed on screen for reference, for example:
The Calling and Network Features and Care Level screen is displayed next - this is common to all provisioning scenarios and is explained in more detail in a later section.
Once the Features have been chosen the next screen is for capturing the on site contact name, which Openreach require, and the date for the restart to take place, see below:
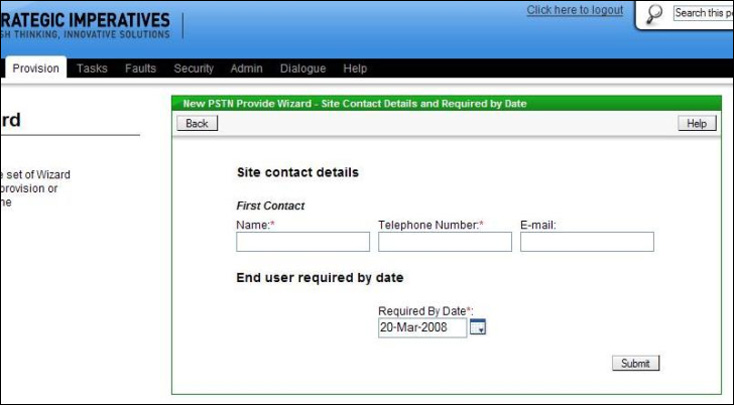
The default "Required by Date" entered is the current date, if before 4pm, or the next day if after 4pm. If required the user can change the required date to a future date, there is a "calendar" button to allow this to be done easily using a pop-up calendar.

The Directory Entry screen is displayed next - this is common to all provisioning scenarios and is explained in more detail in a later section. When the directory entry has been chosen and the "Add" button clicked, then the order is submitted to Openreach, this is confirmed on screen with the Openreach order reference, for example:
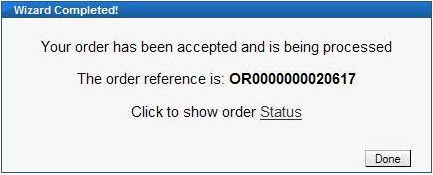
Clicking on the "Order Status" link will display the details of the order and allow its current status to be tracked through to completion.
| Previous subject | Main Navigation | Next subject |